

Introduction
This beginner's guide is for users who are completely new to Wave Corrector. It details the steps involved in completing Wave Corrector's basic functions. These are:
|
1. Making a recording on your hard disk. |
|
2. De-clicking (vinyl) or de-hissing (tape/cassette) |
|
3. Splitting into separate tracks. |
Wave Corrector can process files produced by its built in recorder as well as files produced by other recording programs. If you use another program to make your recordings, make sure that the files meet the following specification:
|
File type: |
.wav. .flac or .ape |
|
Sample rate: |
44.1, 48.0, 88.2 or 96.0 kHz |
|
Resolution: |
16-bit or 24-bit |
|
No. or channels: |
2 (stereo) |
If you use the built-in recorder, these requirements will automatically be met.
Getting Help
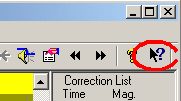
Wave Corrector supports context sensitive help. This means that you can press the function key F1 from most screens to get specific help for the task you are undertaking.
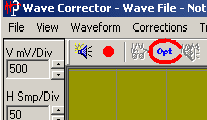
Alternatively, you can also click on the Context Help toolbar button and then click on a menu item or toolbar button for help about the associated command.
Making Recordings with Wave Corrector
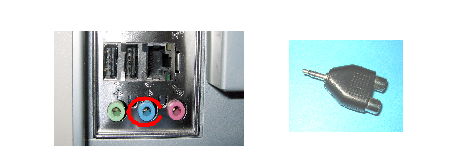
1. Connect your recording source ( turntable or tape/cassette player) to the line-in socket on your your PC?s soundcard. Most soundcards have a row of three colour coded sockets as illustrated. In this case, connect to the middle (blue) socket.
Use an adapter like the one shown to convert from RCA (phono) connectors common on hi-fi equipment to a 3.5mm jack plug for entry into line-in socket.
Note, your record player/turntable may require an external pre-amplifier with RIAA equalisation.
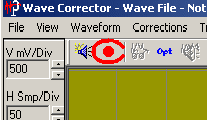
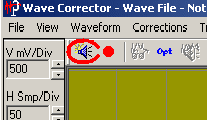
2. Start Wave Correcter and click on the record icon:
3. Type in a file name for your recording and if necessary, select a folder for storing your recording. Finally, select 'Save'. The Recording Window will then appear:
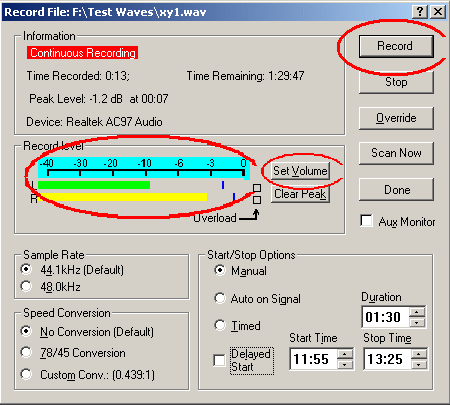
4. Start your record or tape playing and check that the volume bars are moving in sympathy with the music. Set the volume so that the peaks of the music go near to maximum but don't overload. If the volume is wrong, or if the bars aren't moving at all, click the Set Volume button. This will enable you to select the input you are using and to adjust the volume.
5. When the volume is set correctly, start your record or tape playing again from the beginning. Just before the music starts press the ?Record? button. This will start the transfer to your hard disk.
- Important Note: If you are recording from tape or cassette, make sure you include a second or two of the lead-in period. This will enable Wave Corrector to measure the tape hiss and is necessary for hiss reduction to be effective.
- When the record or tape finishes, press the 'Stop' button.
- Your recording is now complete and saved under the name you specified in step 1. At his point, you can press 'Done' to close the recording window. Alternatively, you can press ?Scan Now? to immediately load the file into Wave Corrector for noise removal and/or track splitting.
How to Process Audio Files
Wave Corrector analyses and corrects files as they are loaded in. If the source material is vinyl, the program removes clicks and pops; if the source is tape/cassette, then the program reduces tape hiss. Also during loading, the program divides an album file into separate tracks. The following steps describe the process.
Before loading any files, you need to set the scanning options. To do this click on the Auto-Scan Options toolbar button.
1. Select 'Vinyl' or 'Tape' as the type of source material. If you are processing a single song, you can disable track detection by unchecking the 'Enable' checkbox. Leave the other options on their default settings.
2. Note, the Options window will display automatically the first time you load a file into Wave Corrector and also when you press ?Scan Now? form the built-in recorder.
3. Click the 'Open File...' toolbar button and select the file you want to process.
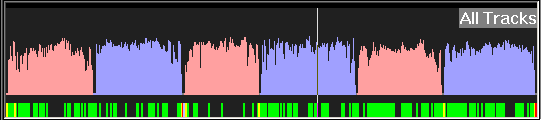
The file will be loaded and noise reduction (click or hiss removal) will be applied. The file will also be scanned for breaks (silence) between tracks. At the end of the process, a list of tracks will be produced and the tracks will be displayed in alternating colours in the bottom Overview window.
4. Check that the program has identified the correct number of tracks. The tracks are listed at the bottom of the Tracks menu together with the running time of each track.
Occasionally the program may find too many or too few tracks. In this case, use the Re-Scan tracks command on the Waveform menu and enter a target number of tracks to find.
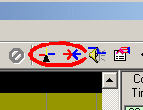
Sometimes, it is not possible to automatically detect tracks. This can be when the music includes long quiet periods. In this case, use the 'Merge Tracks' or 'Split Track' toolbar buttons to manually set your tracks.
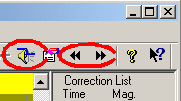
5. Now audition the individual track boundaries to ensure that they are exactly where you want them. You can step between the track boundaries by clicking on the black arrow toolbar buttons. Use the 'Audition Track Boundary' toolbar button to hear the effect of any adjustments you make.
Track boundaries are displayed in the main window.

The boundary is represented by the white vertical line. If it needs repositioning, drag it to the left or the right with the mouse. Note you can also set a fade period by dragging in the yellow area at the top of the window.
When you are satisfied that the tracks are correct, select the command 'Save & Close' on the File menu. This will save separate files for each of the tracks on your recording. By default, the track files will be named like the original file but with a 'cor' suffix together with a numeric indication of the track number. For example, if the original file was called MyFile.wav, then the track files will be called MyFilecor01.wav, Myfilecor02.wav, etc.
The Save & Close window allows you to alter this naming rule according to your preference. If you have used the Tracks Properties feature to set titles, artists etc., then you can you can include these ?tags? in your file names.
Moving Forward
Now that you have successfully processed your first files in Wave Corrector, you will probably want to explore its more advanced features. Wave Corrector allows you to edit individual vinyl click corrections, normalise the volume of recordings, apply digital filters, and much more.
To learn more about the capabilities of Wave Corrector, refer the the User Manual or look in the program?s Help File.
Good luck with all your restoration projects!